
Easy No-Cooking, No-Canning Black Currant Jam
Are you a fan of black currants? Do you want to enjoy their taste all year round? Then, you should try making No-Cooking, No-Canning black currant jam. Not only is it delicious, but it can also be stored in the refrigerator for up to a year.
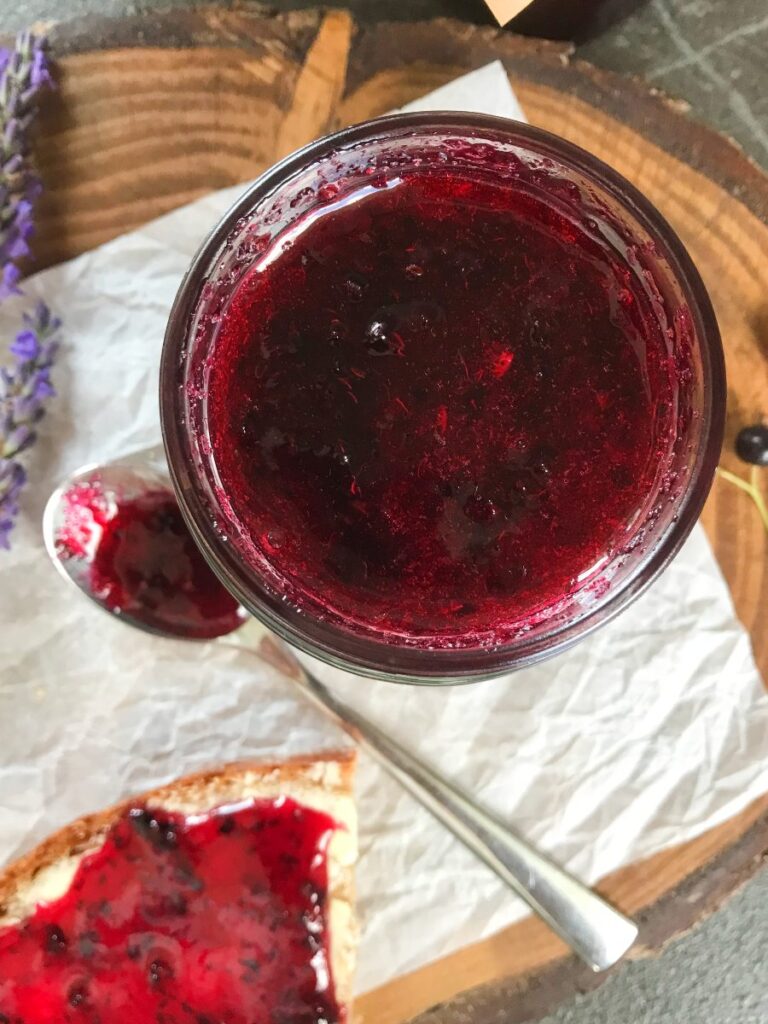
Black currant refrigerator jam is not only tasty but also incredibly versatile. You can spread it on your morning toast, swirl it into yogurt for a delightful breakfast, or even use it as a filling for cakes and pastries. The best part? It’s super easy to make!
Some of the links on this page might be affiliate links. View my Privacy Policy for details.
Is black currant jam good for you?
This recipe comes from my mom and we grew up eating this jam. It is full of flavor because black currants are that way:) and since you are not cooking the berries, they keep all the flavor and all the health benefits. Here is a great article from loovfood.com on the health benefits of black currants: What are blackcurrants and why are they good for us? .
Fun Fact: Did you know that “by weight, black currants contain three to four times more vitamin C than oranges”? (ndsu.edu)
Is it safe to make black currant jam without cooking and canning?
Yes. This method of preserving berries is legitimate, at least for black currant berries. (I haven’t heard of it being used on other berries). It is a well know method in Russia and there are tons of recipes for it out there in Russian. One site I found calls it “living” jam. Unfortunately, this method is not well-covered in the the English internet world, at least, not in any detail.
Why does this No-Cooking, No-Canning method work?
This method for making Black Currant Jam works, because of the sugar used in the recipe. The wordy, scientific explanation is here: “When sugar is added to fresh foods, like fruits and vegetables, it creates an osmotic effect. This means sugar absorbs water in the food resulting in the reduction of water activity. Bacteria need water to grow and multiply, so lowering the water activity in a food product means there is less free water molecules for the bacteria. It creates an environment that limits microbial survival and growth.” (source: sugarnutritionresource.org).
In plain English, this just means that putting enough sugar into the crushed berries will preserve the berries, preventing the jam from going bad.
Ratio of Sugar to Berries in Black Currant Jam
The ratio of berries to sugar in this recipe is 1:1. So for every pound of berries you will need one pound of sugar. This is enough sugar to preserve the berries and keep them from going bad when you store them in the refrigerator.
Apparently, if you want to keep the jam from going bad and if you can’t use the fridge for it, you can increase the ratio of berries to sugar to 1:2, and the jam will still be good kept in a cool, dark place. However, I did not test this combination, so I can’t confirm if it truly works.
How to Prepare Black Currant Jam with No Cooking and No Canning
Start with with fresh and ripe black currants. Using a medium-sized bowl, wash the berries under cold water to remove any dirt or debris. Remove any of the small stems still clinging to the berries and discard any damaged or soft/overripe berries. Gently pat the currants dry with a clean kitchen towel or paper towels, being careful not to crush or bruise them.
Using a kitchen scale, weigh your black currant berries so you know how much you have after you’ve washed them and removed debris and/or bad berries. You will need to know the amount in order to know how much sugar to put into the jam.


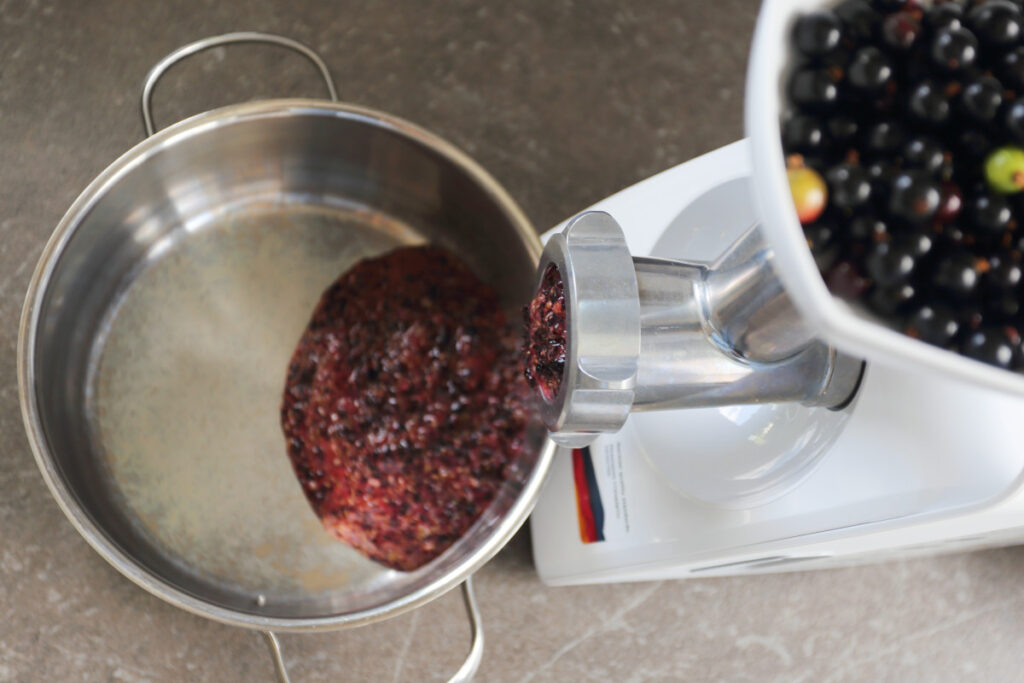
After weighing the berries, proceed to grind the berries using a meat grinder. You can also use a blender or a food processor instead of a meat grinder. I prefer the meat grinder as the berries are not completely crushed smooth after processing and still have a good texture. The result is a puree-like consistency that spreads effortlessly on toast or swirls beautifully into yogurt.
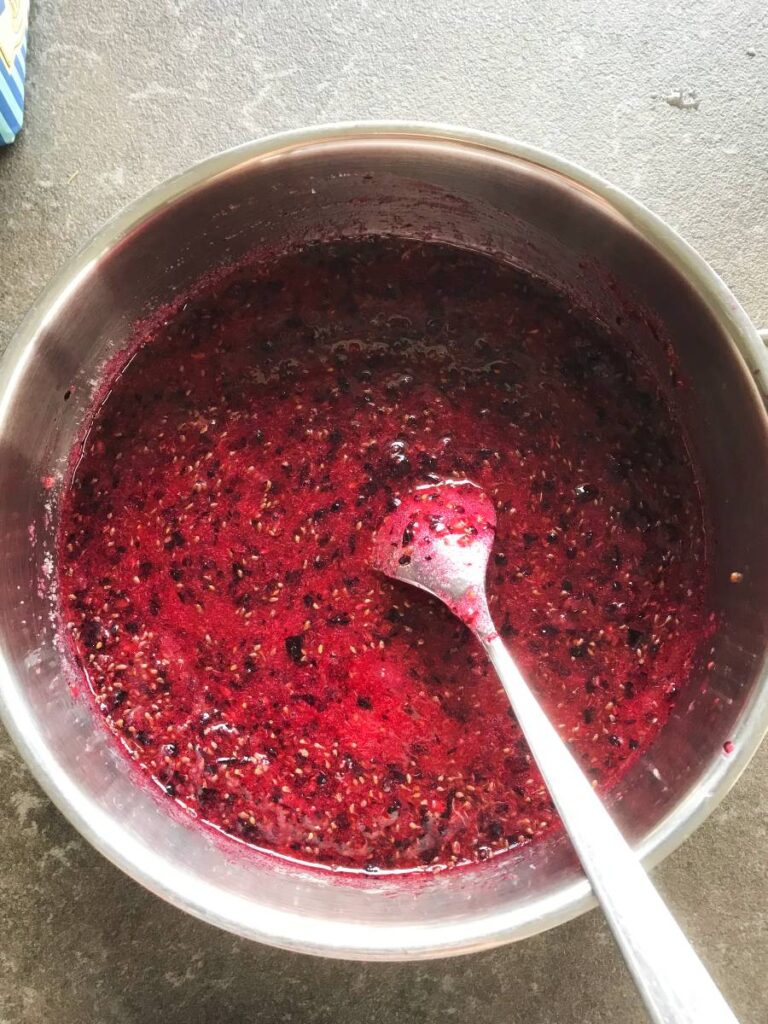
Next, add the sugar to the ground berries. As mentioned above, the ratio of sugar to berries in this recipe is 1:1. This ensures that the berries are properly preserved and won’t go bad in the fridge.
Mix the sugar well into the berries and let the mixture stand until sugar is fully dissolved. Stir the jam once in a while. You will see once the sugar is dissolved as there will no longer be any sugar granules on the sides of your pot/bowl. This can take from 2-4 hours depending on the amount of berries and sugar you have.

I recommend placing the ground berries and sugar in a cooking pot so that you have a lid to cover the jam with as it stands. You can also use a bowl with a lid. Or cover with plastic wrap, or even a kitchen towel.
How to sterilize the Jars
Once your jam is ready, sterilize the jars. Start by washing the jars and lids with hot soapy water, making sure to remove any dirt or residue. Rinse them thoroughly to ensure there is no soap left behind. My preferred method of sterilizing jars, is to use a pot filled with water and boiling everything for 10 minutes. You can also bake the jars in the oven, or check out this article on all the ways you an sterilize jars.
After the jars and lids have been sterilized, carefully remove them from the water and place them on a clean towel to dry. Now, they are ready to be filled with your homemade black currant jam.
Note: the National Center for Home Food Preservation has a lot more details on sterilizing jars, if you would like to read up on this topic.
Preserving Black Currant Jam
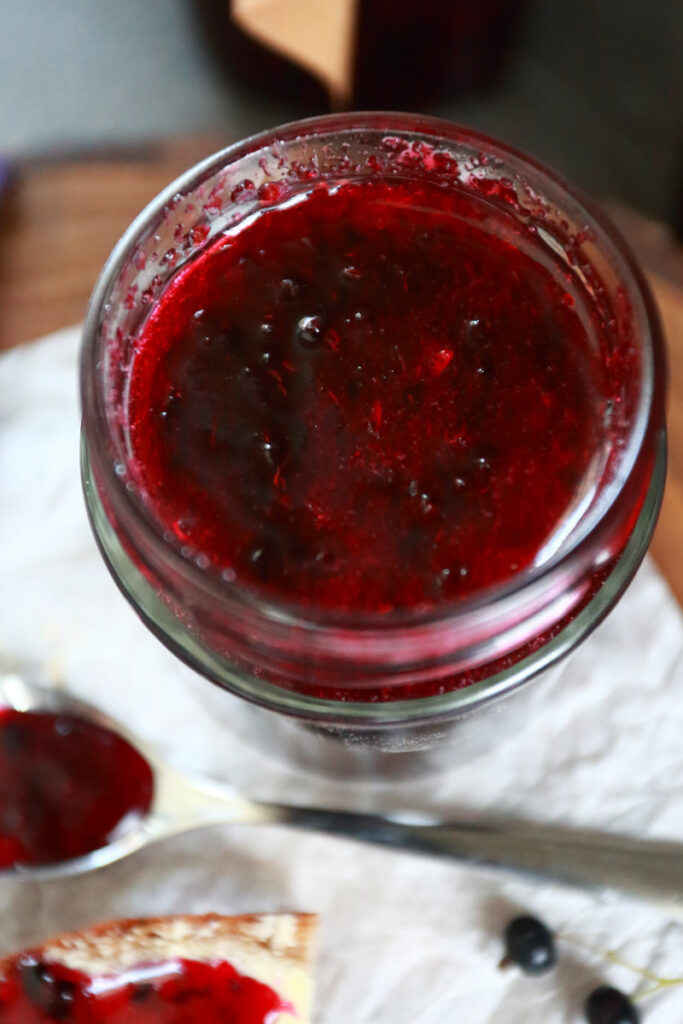
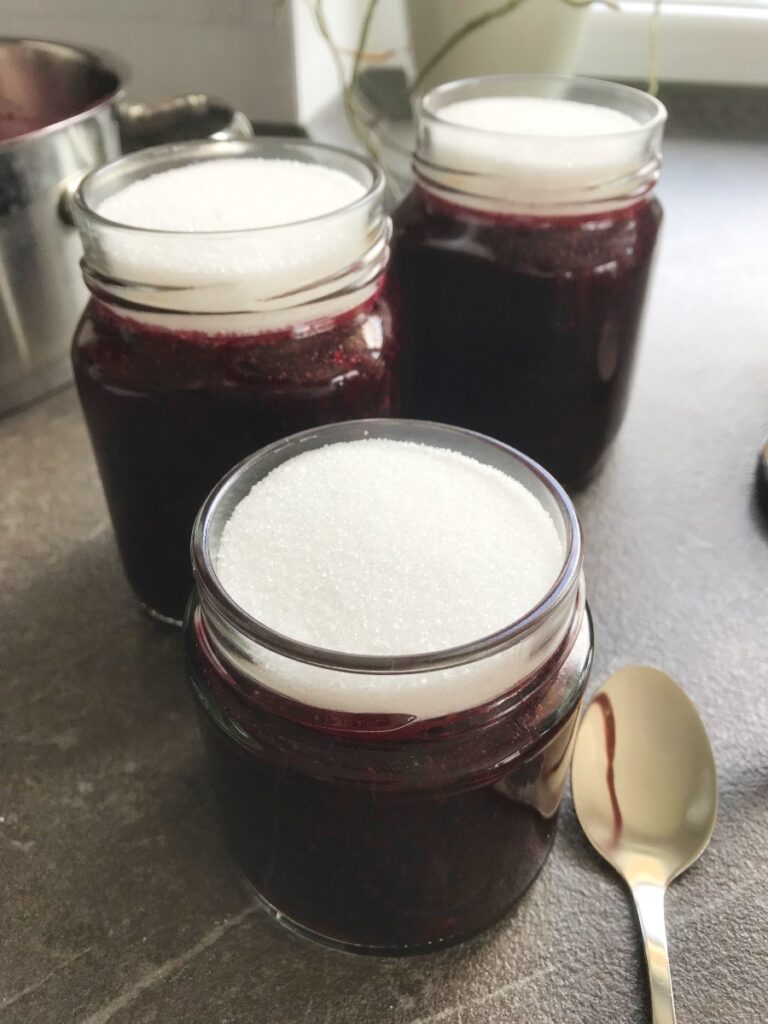
Fill the jars with the finished black currant jam, leaving about half an inch of space on the top. You can use a funnel to fill the jars and make the process less messy. I just used a spoon to carefully ladle the jam into the jars and then poured the rest directly from the pot.
Once all the jars are filled, slowly pour in some sugar about 1/4 inch deep on the top of the jam. Make sure the sugar is evenly spread and completely covers the jam, then close the jars using the lids. The extra sugar on the top closes off the jam itself from moisture and water. It will absorb any extra water that might be on the top of the jam and will keep the jam from going bad.


How to store and use black currant jam
Label each jar with the date of preparation, so you know exactly when it was made then keep all the jars in the refrigerator and use as needed.
When you open a jar, you will notice that the sugar seal will have taken on the color of the jam. Check to make sure that there is no mold, as that can happen sometime if the lid wasn’t properly closed.
The sugar seal on the top should just be mixed in with the rest of the jam. It will eventually just dissolve in the jam.
Once a jar of jam is opened it should be used up within 3-4 weeks so it doesn’t go back.

Lastly, if you make this No-Cooking, No-Canning Black Currant Jam, make sure to leave a comment and/or give this recipe a rating here! I’d love to hear back from you and will do my best to answer and respond to every comment. And of course, don’t forget to tag me on Instagram if you make this recipe. I’d love to see the photos of the recipes you have made!

No-Cooking, No-Canning Black Currant Jam
Equipment
- Meat grinder
Ingredients
- 1 lb Black currant berries
- 1 lb Sugar
Instructions
- Wash the black currant berries removing any damaged berries, stems, leaves, etc. Set out on a kitchen towel to dry.
- Weigh the berries using a kitchen scale and then, grind the berries using a meat grinder.
- Add sugar to the ground berries, stir well and let mixture stand until the sugar dissolves (about 2-4 hours).
- Sterilize jars and lids by cooking them in hot water for 10 minutes. Let cool a bit.
- Transfer the finished jam into the jars, leaving about 1/2 inch headspace.
- Create a sugar seal by pouring about 1/4 inch layer of sugar into each jar and making sure it is evenly spread.
- Cover the jars with the lids and store in the refrigerator for up to a year.
- When opening a new jar, mix in the sugar seal into the jam and mix well. Serve as you normally would.
Notes
Looking for additional jam recipes? Check out my Recipe for Apple Jam without Pectin. Seriously easy to make.
Love it! This is similar to the recipe I’ve used to make black currant preserves in the past. I use 1.5:1 sugar to currant ratio. I heat the mixture to ~130 degrees to dissolve the sugar but maintain the color. This jam lasted over three years and was as good as the day I made it. Cheers!
Thanks! Your way sounds good, too. You can dissolve the sugar faster that way. I just forget about it and let it stand for a while:)